
티스토리 뷰
이전에 작성한 회원가입 구현 파일을 그대로 사용하여
게시판 구현도 해보려 한다.
우선 구현할 기능은 정말 간단한 게시판이고 로그인된 상태로만 글쓰기가 가능하게 만들것이다.
우선 템플릿의 수정과 생성이 필요하다.
									//header.pug

    .header__colume
        a(href="/notice") 게시판


									//mixins/post.pug

 mixin post(video = {})
    a(href=`/notice/${video.id}`)=video.title
    if video.description
        p=video.description


									//notice.pug

extends layout/main
include mixins/post

block content
    a(href="/posting") 게시물 작성
    ul
        each posting in postList
            li
                +post({
                    title:posting.title,
                    id:posting._id
                })

									//postDetail.pug

extends layout/main
include mixins/post

block content
    h1=postList.title
    p=postList.description

									//posting.pug

extends layout/main
include mixins/post

block content
    form(action=`/posting`, method="post")
        input(type="text", name="title", placeholder="제목")
        textarea(name="description", placeholder="Description")
        input(type="submit", name="submit")
1. 헤더에 게시판으로 갈 수 있는 a 태그를 만들어 줬다.
2. 게시판은 notice.pug 템플릿이다.
3. 게시판에 글은 mixin 으로 post.pug 템플릿을 사용한다.
4. 해당 게시물을 클릭하면 postDetail.pug 가 렌더된다.
5. 게시글 작성은 posting.pug 에 있는 form 을 통해 method post 로 submit 된다.
사실 mixin 을 사용해서 post와 postDetail 을 같이 쓸 수 도 있었는데
만들고 나서 생각났다...
템플릿은 준비되었으니 라우터를 만들어 본다.
기존에 쓰던 globalRouter 가 있어서 따로 만들려 했지만 또 귀찮아서
그냥 한꺼번에 쓰기로 한다. 이럴꺼면 굳이 왜 이름을 globalRouter로 지었는지..
globalRouter.get("/notice", getNotice); //게시판 접근시

globalRouter.get("/postnotice", getPosting); //게시글 작성 화면에 접근시
globalRouter.post("/postnotice", postPosting); //게시글작성 후 submit 되었을시

globalRouter.get("/notice/:id", postDetail); //게시글을 클릭시
이제 라우터에 맞는 컨트롤러를 만들어보자.
export const getNotice = (req, res) => {};

export const getPosting = (req, res) => {};
export const postPosting = (req, res) => {};

export const postDetail = (req, res) => {};
이렇게 된다.
이제 필요한건 mongoose를 이용해 DB에 들어갈 모델을 만들어 준다.
//Post.js

import mongoose from "mongoose";

const PostSchema = new mongoose.Schema({
  title: {
    type: String,
    required: "title is required"
  },
  description: {
    type: String,
    required: "description is required"
  },
  createdAt: {
    type: Date,
    default: Date.now
  },
  comments: [
    {
      type: mongoose.Schema.Types.ObjectId,
      ref: "Comment"
    }
  ],
  creator: {
    type: mongoose.Schema.Types.ObjectId,
    ref: "User"
  }
});

const model = mongoose.model("Post", PostSchema);
export default model;
크게 이렇게 필요할 것 같다. 코멘트를 달 수 있게 만들(예정)것 이고 작성자도 구분할 수 있었으면 좋겠어서
Schema는 이정도 만들었다.
모델도 생겼겠다 이제 다시 컨트롤러 작업을 시작해 본다.
우선 작성된 게시글이 있을때 게시판에 넘겨주는것부터 시작한다.
export const getNotice = async (req, res) => {
  const postList = await Post.find({});
  res.render("notice", { postList });
};
Post.find 는 Post 안에 있는 모든 정보들을 꺼내줄 것이고 그것을 postList 라는 변수에 담아 게시판 템플릿으로 전달한다. 앞서 템플릿에서는 이미 postList 를 받아서 그릴 준비가 되어있으므로 이름만 맞춰주면된다.
이제 게시물 작성부분을 작업해보자.
우선 게시글 작성 템플릿을 렌더해줄 get 을 먼저 만든다
export const getPosting = (req, res) => {
  res.render("postnotice");
};
getPosting 은 그저 게시글 작성 폼을 렌더하는 역할이므로 이게 전부이다.
이제 form 에서 submit되었을때 즉 post 되었을때를 작성해준다.
export const postPosting = async (req, res) => {
  const {
    body: { title, description }
  } = req;

  const newPosting = await Post.create({
    title,
    description,
    creator: req.user.id
  });

  res.redirect("/notice");
};
이전에 설치했던 미들웨어인 body-parser 에 의하여 submit 되었을시
form 에 입력했던 정보들을 쉽게 조회할 수 있는데
이를 구조분해 할당으로 필요한 정보만 뺀다.
이제 mongoDB에 데이터를 만들 수 있게 이전에 작성했던 모델에 양식 맞춰서
Post.create 를 이용하여 작성해 준다.
뭔가 말이 어려운데 그냥 폼에서 넘어온 정보를 미리 지정해놓은 서식에 맞춰서
꾸민다음에 DB에 넘기는것 쯤으로 생각하면 될것같다.
이후 res.redirect 를 이용해 게시판 처음화면으로 이동하도록 해준다.
작성한 게시물로 이동하게 하려면
res.redirect(`/notice/${newPosting.id}`);redirect 부분을 요런식으로 바꿔주기만 하면된다. 쉽다 쉬워
(라우터를 만들때 /notice/:id 로 만들어놨기때문에 해당 게시물의 id가 무엇이든 이렇게 연결되는것)
근데 이렇게하고 테스트하면 해당 url에 대한 컨트롤러를 아직 만들지 않았기때문에
무한로딩 혹은 에러가 날것이다.
얼른 만들어 주자
export const postDetail = async (req, res) => {
  const {
    params: { id }
  } = req;

  const postList = await Post.findById(id)
  res.render("postDetail", { postList });
};
여기서 params 란 express route parameter를 이용해 추출 할 수 있는 것인데,
앞서 라우터를 말할때 /notice/:id 이것을 예로 들어보면
express 에서 url 에 :id 라고 작성했다면 콜론 뒤에 id 가 key값이 되는 것 이다.
때문에 req.params 를 콘솔에 출력해보면 { "id":"dqwdd12312fqwe" } 이런식으로 출력되어진다.
id 가 아니라도 어느 이름이건 상관없이 작명한대로 불러올 수 있다.
내가 작성한게 key값이 되어지고
실제 그 자리에 들어가는 정보가 value가 되는 것 이다.
때문에 실제로는 게시글의 DB id가 그 자리에 들어갈꺼고 그 실제 id 를 가지고
findById 를 통하여 DB내에서 조회하여 찾아내고 그놈을 변수에 담아
템플릿에 전달한다.
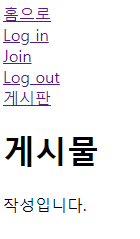
그럼 아주 쉽게 이런 게시판을 만들 수 있다.
이제 미들웨어를 하나 만들고 로그인한 사람만 게시물을 작성 할 수 있게 만들어본다.
middleware.js 에 아래처럼 하나 만들어준다.
export const private = (req, res, next) => {
  if (req.user) {
    next();
  } else {
    res.redirect("/");
  }
};
passport 에 의하여 현재 로그인한 사용자의 정보를 어디서든 req.user 로 조회할 수 있기 때문에
가능한 일이다.
이렇게 만약 현재 사용자가 로그인 되어져있다면 다음 작업을 실행하고 아니라면 홈으로
redirect 되도록 만들어주고
globalRouter.get("/posting", private, getPosting);이렇게 가운대에 꽂아주면 된다.
다음은 코멘트기능과 스타일링을 좀 해봐야 겠다.